How to Purchase the WP htaccess Editor Plugin
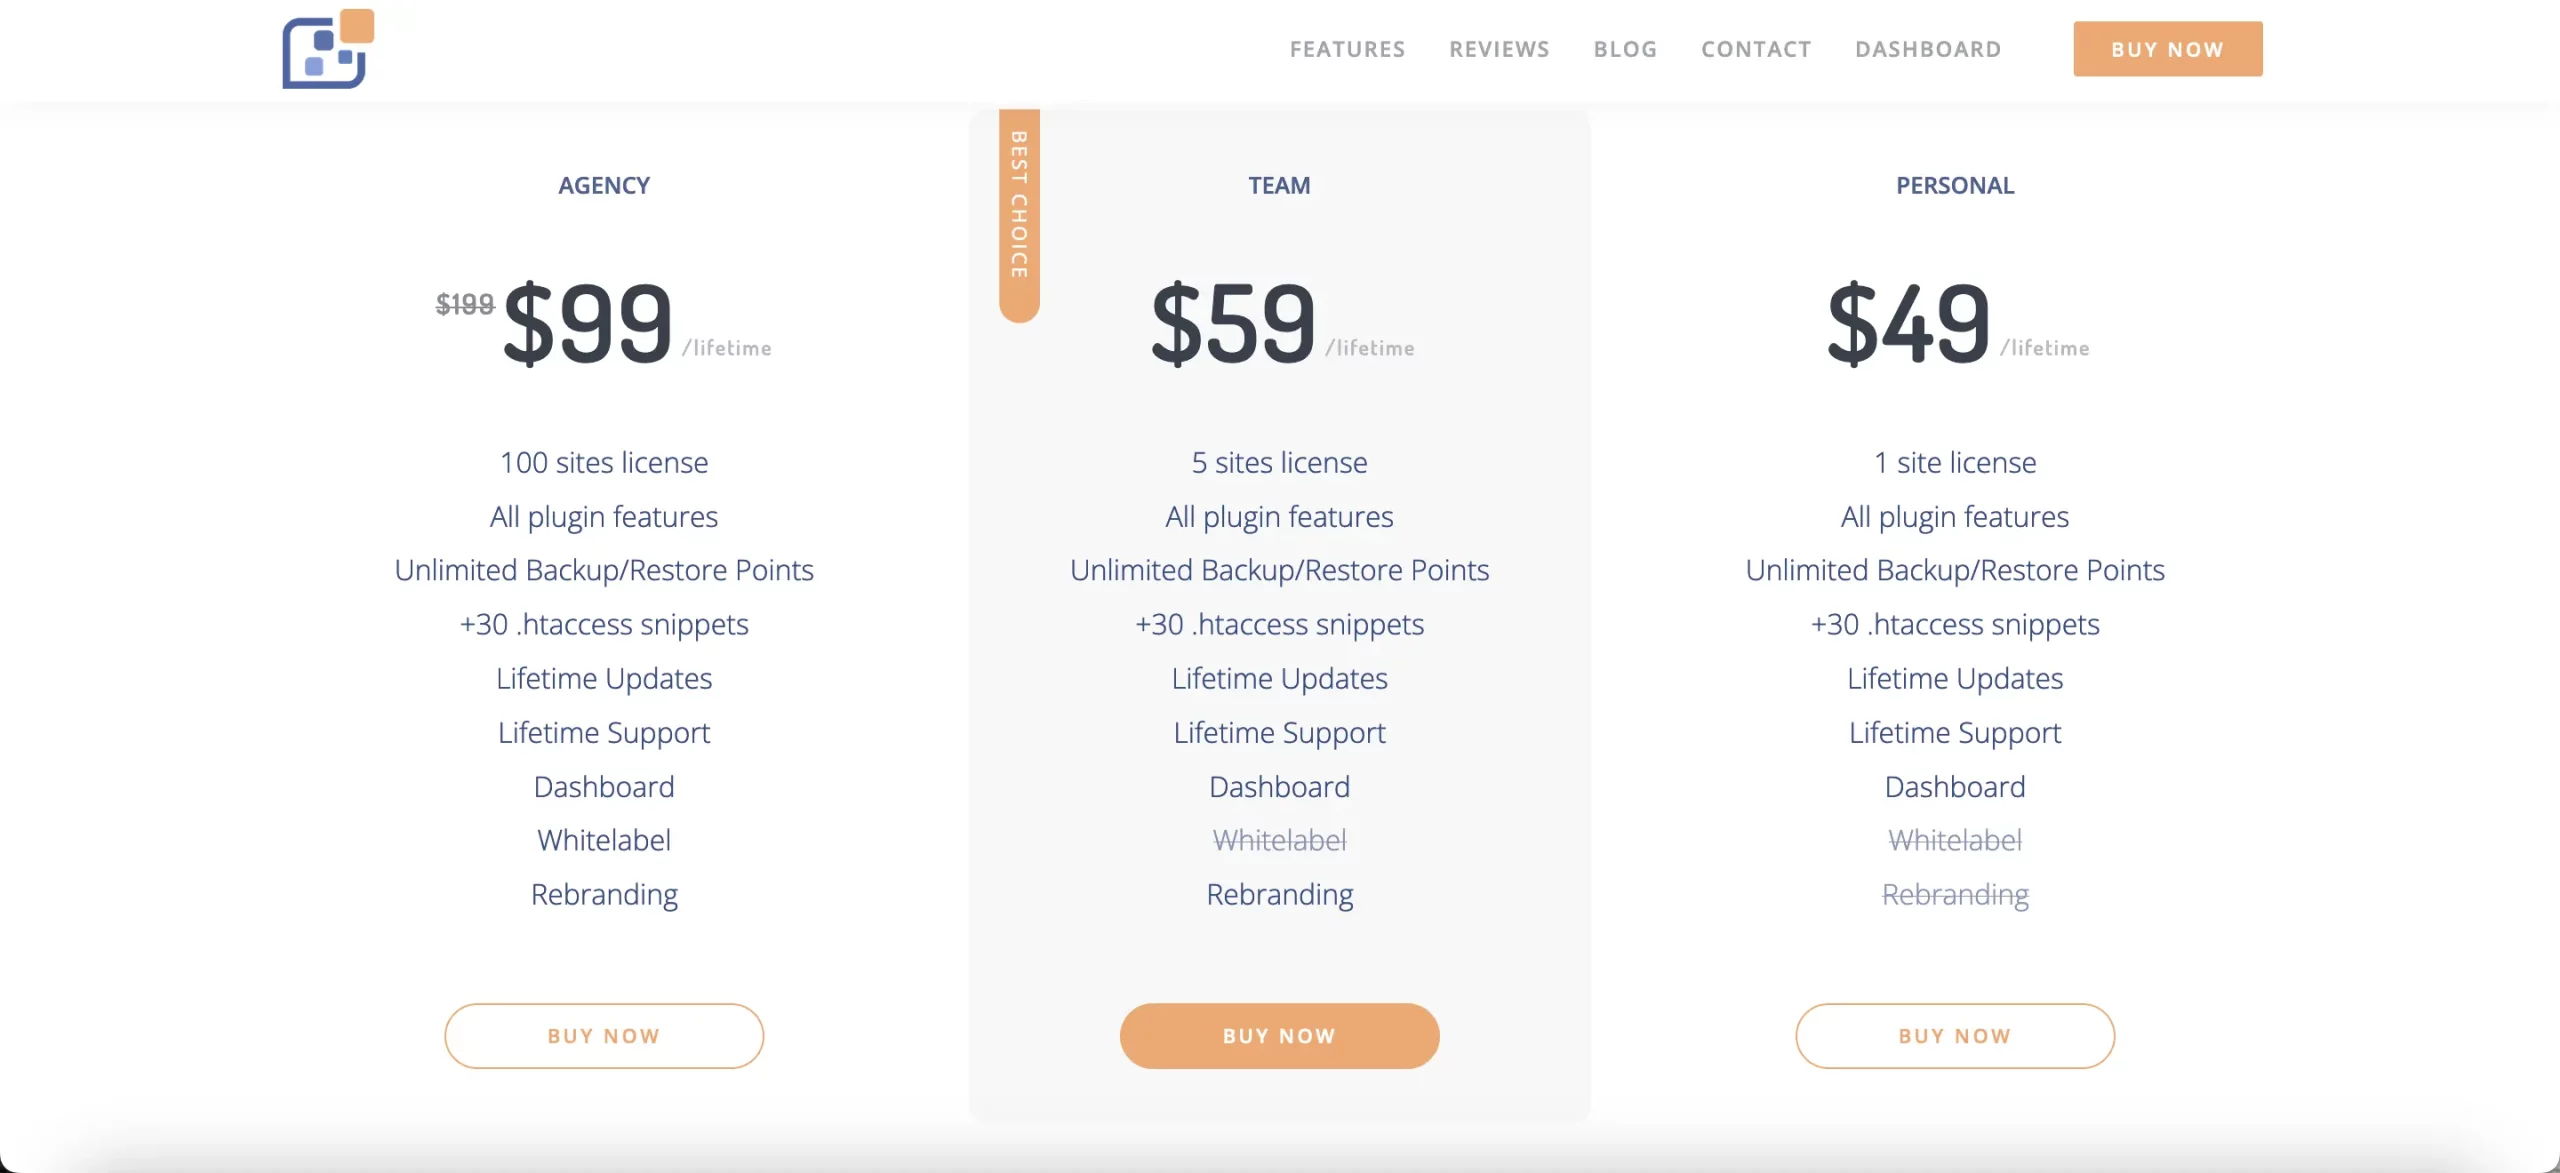
To purchase the plugin, first pick the license plan that suits your needs.
After you select the appropriate plan, you will see the screen with the order summary as shown below:

Enter your email address, country of residence, and subscribe to our latest news if you want, then click continue.
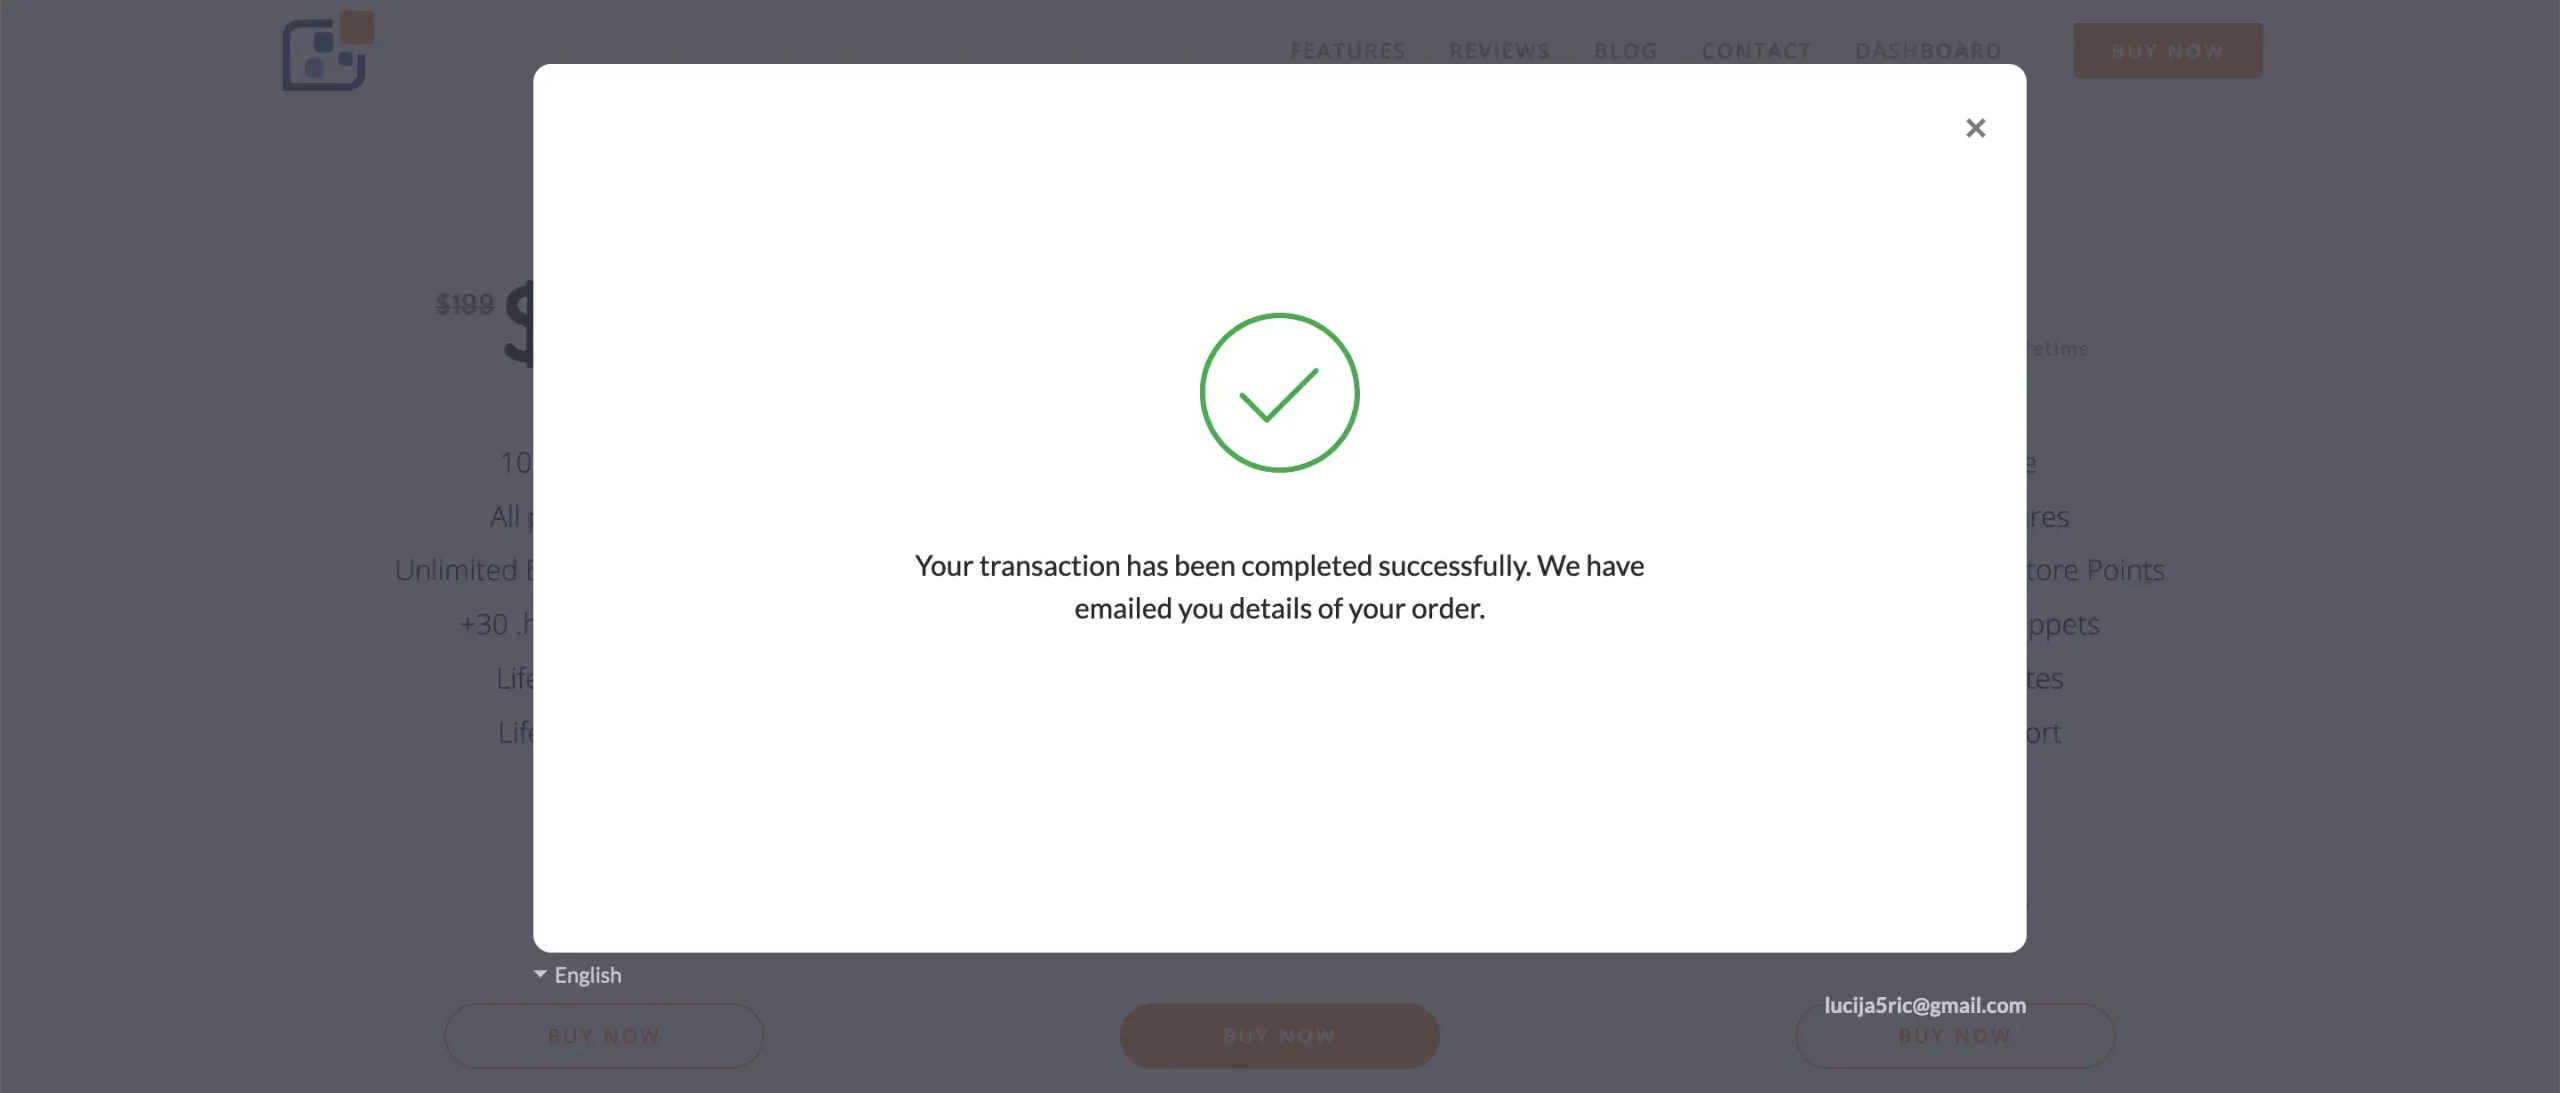
The next step is to pay. The payment can be via credit card or PayPal. Once you have filled that in, complete the checkout process. Once you have completed the checkout, the confirmation message will pop up on the screen as shown below:
Once the purchase is finished, you will receive two emails at the email address you provided during the purchase steps. The first email is the receipt, and the second one is a welcome email with information for accessing the plugin’s dashboard. The welcome email will contain details like:
- WP .htaccess Editor Dashboard: dashboard.wphtaccess.com
- Username: The email address you used during the purchase
- Password: A link to set up your password
- Reset Password: dashboard.wphtaccess.com/reset-password/
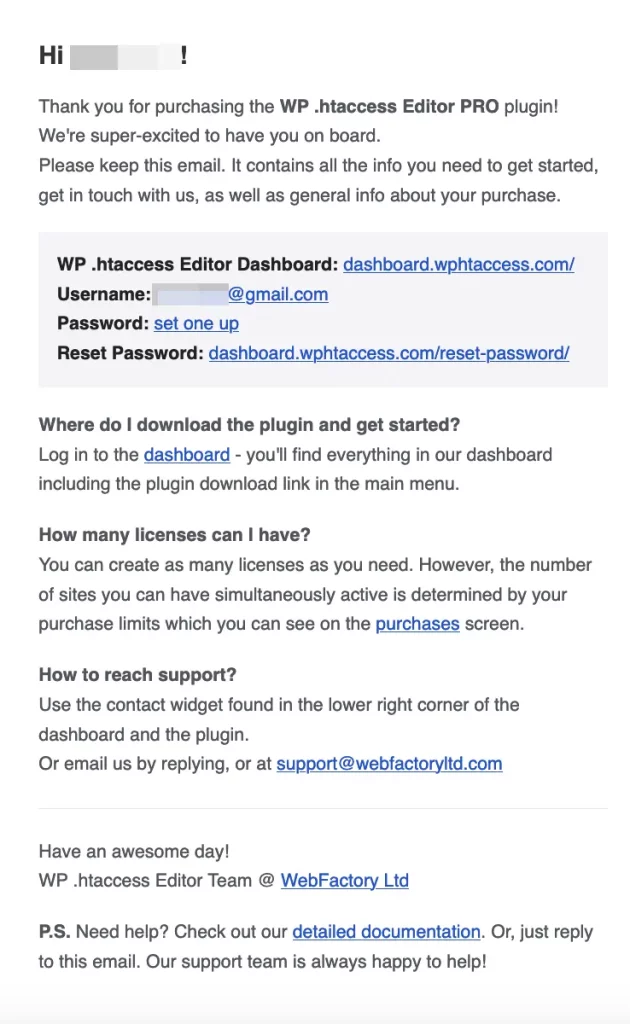
This email contains all the information you need to get started, including how to access the dashboard, manage your account, and get support.
Download the Plugin and Get Started
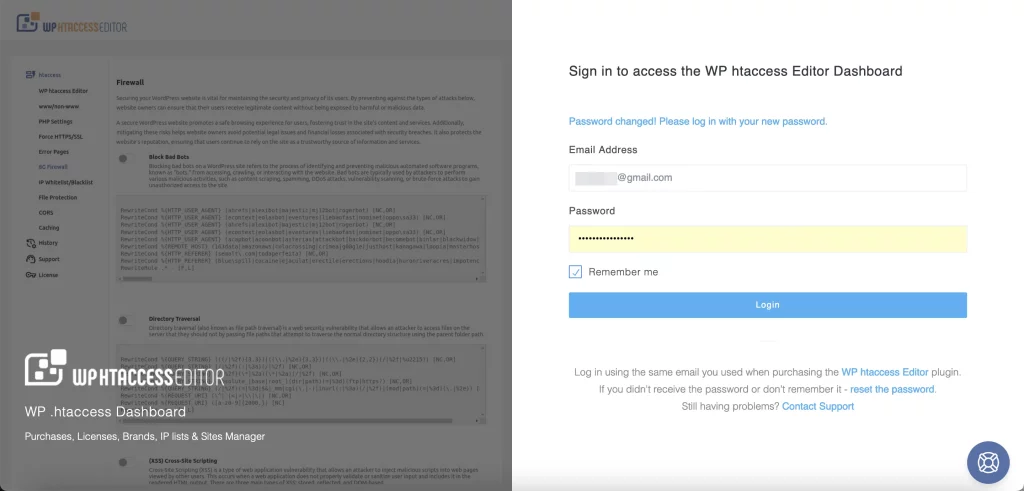
Click on the set up one link for the password provided in the welcome email to create a password for your account. Next, log in to the dashboard – you’ll find everything in our dashboard including the plugin download link in the main menu.
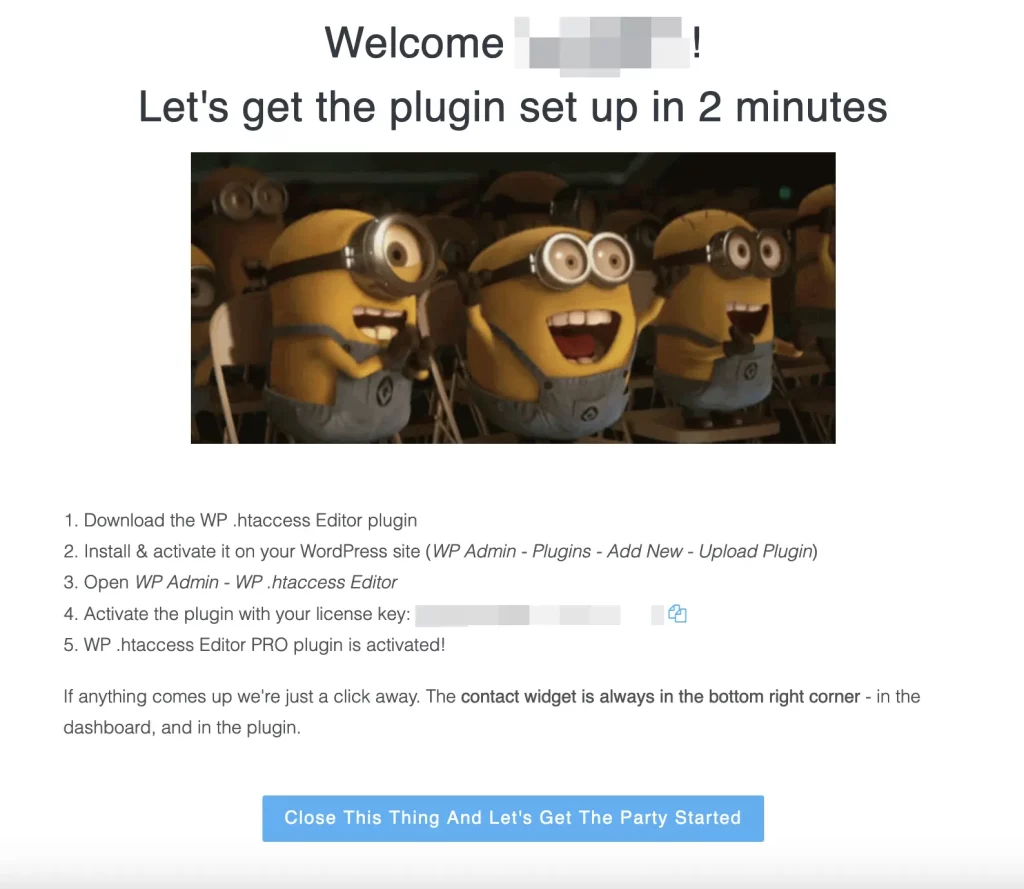
Dashboard Welcome Message
Once you have logged in to the Dashboard for the first time, you will get a pop-up message with the most important info:
- Download the WP .htaccess Editor plugin: A direct link to download the plugin.
- Install and activate: Instructions on how to install and activate the plugin on your WordPress site (WP Admin – Plugins – Add New – Upload Plugin).
- Open WP Admin – WP .htaccess Editor: Steps to navigate to the plugin within your WordPress admin panel.
- Activate the plugin: Use the license key provided in the welcome email to activate the plugin.
If anything comes up, the pop-up reminds you that the contact widget is always in the bottom right corner – in the dashboard and in the plugin.
How to Install and Activate The Plugin
Follow these steps to install and activate it:
1) Download the WP .htaccess Editor plugin.
2) Install and activate it on your WordPress site (WP Admin – Plugins – Add New – Upload Plugin).
3) Open WP Admin – WP .htaccess Editor.
4) Activate the plugin with your license key provided in the welcome email.
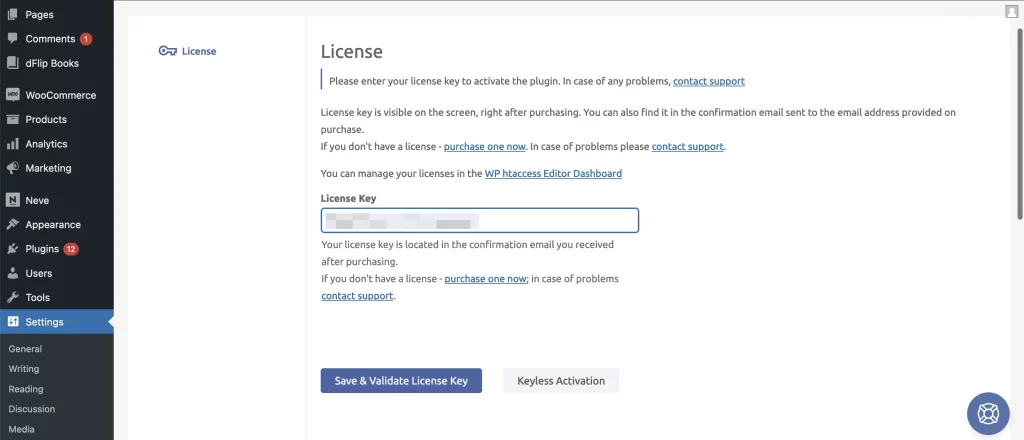
5) The WP .htaccess Editor PRO plugin is now activated!

That is it! The plugin is now installed and activated.